Guidelines for establishing tree crops with drip irrigation
All tree crops can be established quickly and efficiency using drip irrigation, here are some guidelines to ensure success.
Select the right dripline
1. Netafim strongly recommends using dripline with integrated emitters to achieve a wetted strip.
There are many advantages to using integrated dripline over button drippers:
-
-
Integrate driplines have emitters manufactured in at even spacings. This creates an evenly wetted strip along the tree row and promotes strong root expansion. Placing 1 or 2 button drippers adjacent to each tree tends to limit root expansion to a very small soil volume.
-
Dripline is faster and cheaper to install than poly pipe and button drippers.
-
Integrated dripline is far more resistant to blockages from sediments or biological fouling.
-
Emitters inside Integrated driplines can be flushed clean periodically by end flushing the driplines - button drippers can not.
-
2. Choose emitters with 0.7- 1.6 L/hr output flows.
Using emitters with higher flow rates will tend to quickly saturate the surrounding soil, resulting in the irrigation dropping down past the shallow root zone before any lateral spread is achieved. Using lower flow emitters results in wider and shallow wetted soil volumes. The is especially desirable for shallow rooted tree crops such as Macadamia and Avocado. See figure 1 showing the moisture movement from various emitters with different flow rates
3. Choose an emitter spacing of 40-50cm. This will ensure an emitter is always close to each young tree.
4. Speak to a Netafim representative about other key specifications: ie thin wall tapes versus heavy walled dripline and pressure compensation versus non pressure compensation.
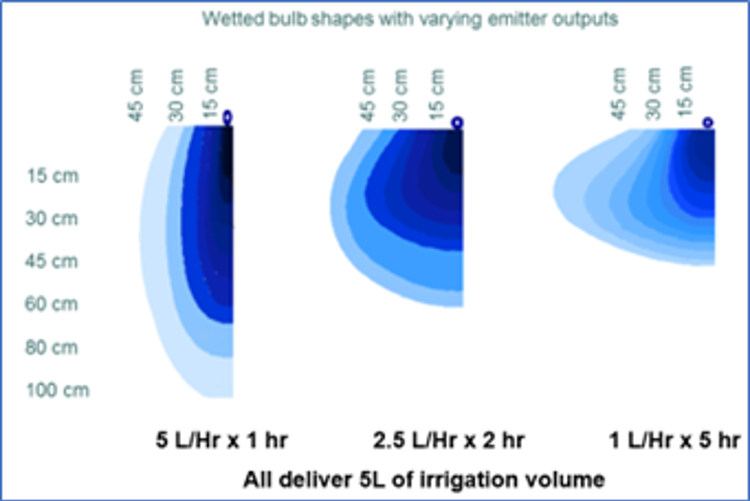
Figure 1 Wetted soil bulbs resulting from different emitter flow rates.
Dripline placement
The key irrigation objectives during young tree establishment are to provide sufficient irrigation to the root zone of each tree and to encourage root growth. To achieve this the applied irrigation needs to be placed where the roots are and just outwards past the roots, but not too deep. This is best achieved with a phased, multiple dripline approach.
Step 1. At planting
A single dripline is usually sufficient for irrigation of very young trees.
Locate the dripline immediately alongside the trees.
Apply enough irrigation time and volume to produce a wetted strip. This usually takes 3-4 hours depending on dripline emitter specifications.
Water as required, it may be every 3rd or so day depending on conditions.
Do not water every day with very small volumes/ durations. This will only create little wet dots that do not encourage root development.
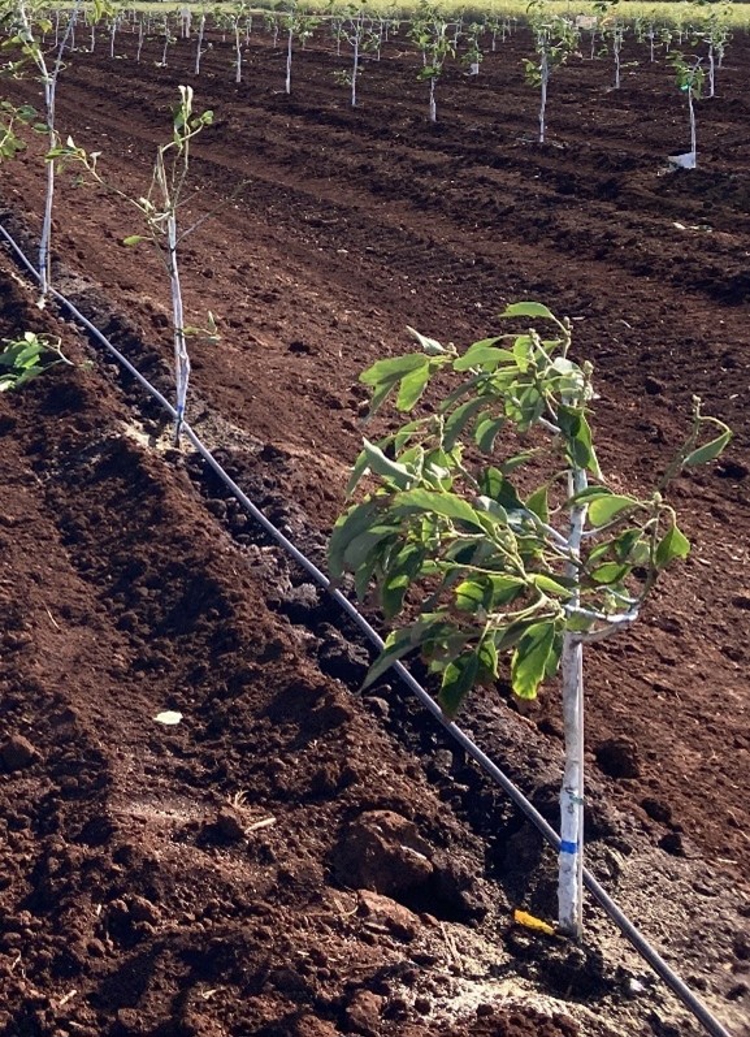
Figure 2. Young Avocado planted with 1 dripline
Step 2: Installing a 2nd dripline
Installing a 2nd dripline is critical for encouraging root expansion. A 2nd dripline enables more irrigation volume to be applied whilst better avoiding saturating a narrow irrigation strip and causing deep drainage.
Expect to install the 2nd dripline within 6 months in tropical regions, within a year of planting for other areas.
The exact timing of when a 2nd dripline should be installed depends on :
-
Tree watering requirements,
-
The soil’s water holding capacity,
-
The depth and spread of the root zone.
The 2nd dripline should be installed on the opposite side of the tree to the 1st dripline and placed outside of the existing root zone to encourage root zone expansion.
If you have 1 dripline installed, are struggling to get enough irrigation on, and struggling to avoid deep drainage past the roots, then you should install a 2nd dripline ASAP.
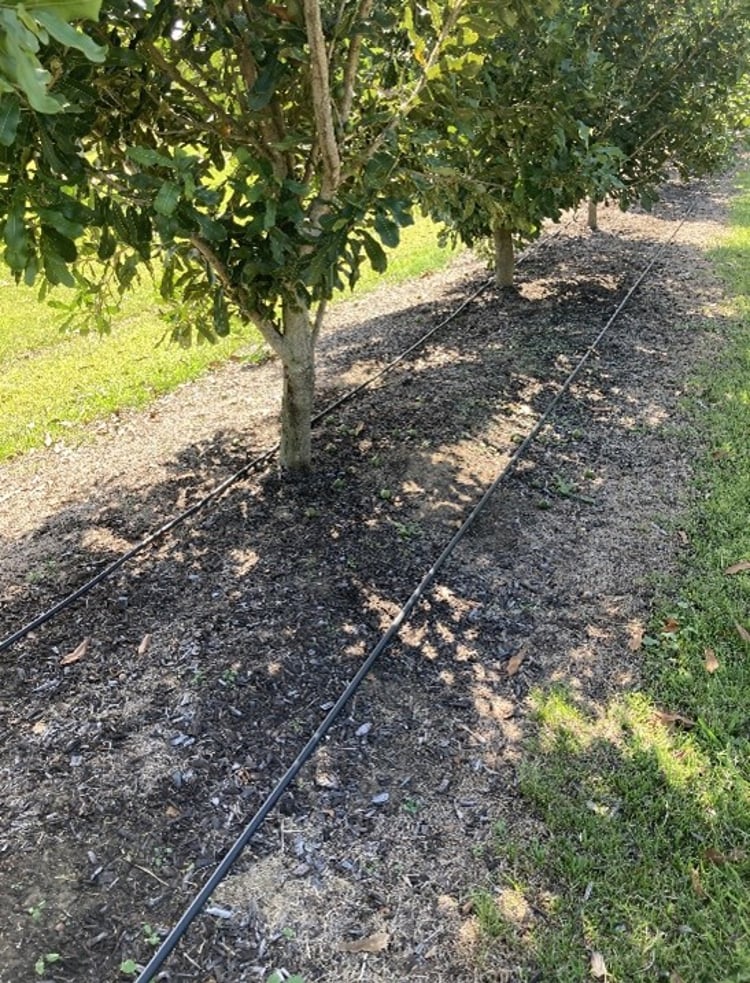
Figure 3. Correct placement of a 2nd dripline
Step 3: Final dripline placement
As the trees grow and their root zones expand outwards, the driplines should be spread out to maximise the width of the total wetted strip.
This typically happens at about 2 years of age in tropical regions, later in cooler climates.
Move the driplines outwards as much as possible whilst still ensuring the wetted strips just merge under the soil surface.
If the final dripline configuration is 2 driplines, then move the 1st dripline outwards. Final placement of the 2 driplines is typically 60-80cm either side from the tree line (depending on soil type). See figure 4.
If the final dripline configuration is for 3 driplines (as used in larger avocado trees), then install the 3rd dripline out from the 1st dripline. The 1st dripline stays in the middle. Spread the other driplines apart evenly to maximise the final wetted strip.
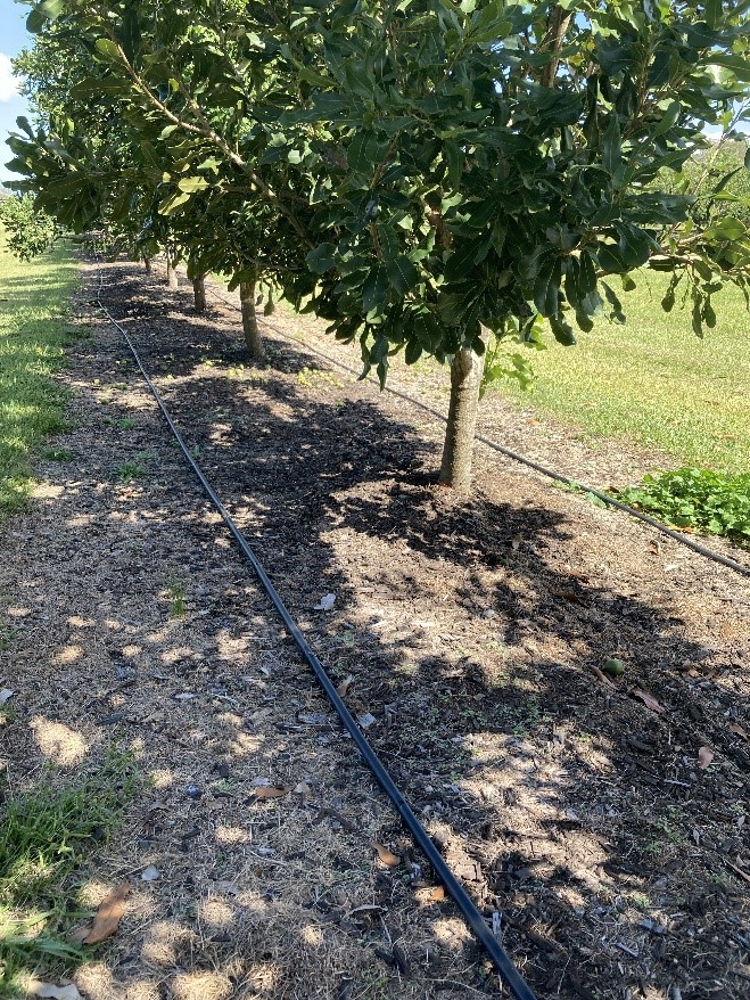
Figure 4. 2 driplines spaced well under 2 year old Macadamia trees.
Soil moisture monitoring
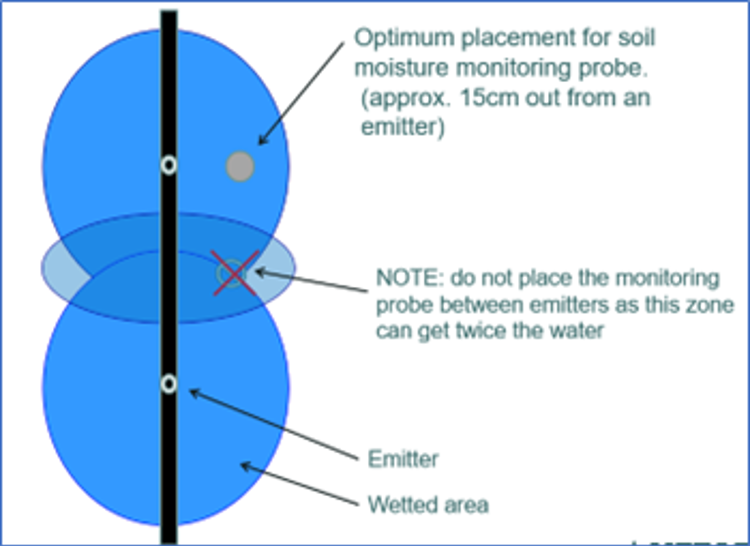
Having some form of automated soil moisture monitoring is very beneficial- especially one that constantly measures soil moisture at multiple soil depths. However, the growers should know to where to install the probe in relation to the tree root zone and the dripline, and how to interpret the information.
Correct Soil moisture monitoring probe placement relative to dripline emitter.


Comments
We'd love to hear your thoughts! To enter a comment, type your name and email address.